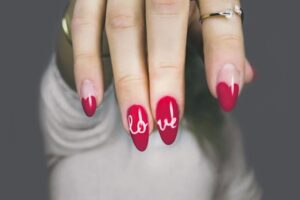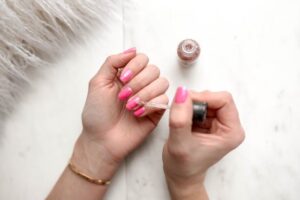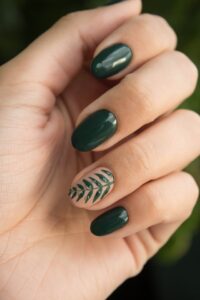
Summer is here, and with it comes the perfect opportunity to show off vibrant and playful nail art that complements the sunny days and warm nights.
Whether you’re hitting the beach, attending a summer wedding, or just soaking up the sun, a stunning manicure can complement any outfit and boost your confidence.
I know how tempting it can be to book an appointment at a nail salon for that flawless look, but let’s be honest – those trips can add up quickly.
That’s why I have decided to share some favorite DIY summer nail art techniques that not only look amazing but also save you money.
With a few affordable tools and some creativity, you can achieve salon-quality nails right at home.
Let’s dive into the world of DIY nail art and discover how you can have stunning summer nails without breaking the bank!
1. ESSENTIAL TOOLS FOR DIY SUMMER NAIL ART

Before we get into the fun part—designing—let’s talk about the essential tools you will need.
Investing in a few key items can make a world of difference in your nail art journey.
Nail Art Brushes
Nail art brushes are indispensable for detailed designs.
You don’t need to spend a fortune to get quality brushes. Look for sets that include a variety of brushes such as detail brushes, stripers, and dotting tools.
You can find affordable and durable options on websites like Amazon or at your local beauty supply store.
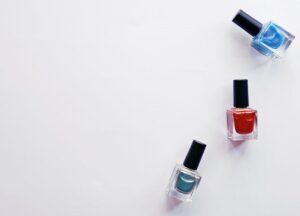
Nail Polishes
Choosing the right nail polishes is crucial for vibrant and long-lasting nail art.
Some budget-friendly brands I recommend are:
- Sinful Colors: known for its wide range of colors and affordability
- Sally Hansen: offers great quality with a variety of shades and finishes
- Wet n Wild: perfect for those who want quality polishes at a low price
Look for sales at drugstores or online retailers to stock up on your favorite shades without breaking the bank.
Nail Stickers and Decals
For those days when you want intricate designs without the effort, nail stickers and decals are your best friends.
They are incredibly easy to apply and can transform your nails in minutes.
Check out online stores like Etsy or Amazon for a vast selection of summer-themed stickers.
Other Tools
Don’t forget the basics: nail files, buffers, and cuticle pushers. These tools are essential for nail prep and maintenance.
You can find budget-friendly kits at stores like Target or Walmart. Investing in a good set of these tools will help you achieve a smooth base and a professional finish.
2. BUDGET-FRIENDLY NAIL ART TECHNIQUES

Now that you have your tools, let’s get creative with some budget-friendly nail art techniques that are perfect for summer.
Gradient Nails
Gradient or ombre nails are a timeless summer favorite. They are surprisingly easy to achieve with just a makeup sponge and a few polishes. Here’s how:
- Materials: two or more nail polishes, makeup sponge, base coat, top coat
- Step-by-Step:
- apply a base coat to protect your nails
- paint your nails with the lightest color and let it dry completely
- dab your chosen colors onto the makeup sponge in the order you want them to appear on your nails
- gently press the sponge onto your nail, rolling it slightly to blend the colors
- repeat until you achieve the desired gradient effect
- finish with a top coat to seal and protect your design
Polka Dot Nails
Polka dot nails are fun, easy, and perfect for beginners. You can use a dotting tool or even a bobby pin. Here’s how to do it:
- Materials: nail polish, dotting tool or bobby pin, base coat, top coat
- Step-by-Step:
- apply a base coat to your nails
- paint your nails with a base color and let it dry
- dip the dotting tool or bobby pin into a contrasting color
- gently dot the tool onto your nails to create a polka dot pattern
- finish with a top coat to seal your design
Striping Tape Designs
Striping tape is a fantastic tool for creating geometric patterns and stripes. Here’s a simple tutorial:
- Materials: striping tape, nail polish, base coat, top coat
- Step-by-Step:
- apply a base coat to your nails
- paint your nails with a base color and let it dry completely
- place the striping tape on your nails in the desired pattern
- paint over the tape with a different color.
- carefully remove the tape before the polish dries
- finish with a top coat to seal your design
Water Marble Nails
Water marbling is a mesmerizing technique that creates unique, colorful designs. Here’s how to do it:
- Materials: room-temperature water, nail polishes, toothpick or orange stick, tape or petroleum jelly, base coat, top coat.
- Step-by-Step:
- apply a base coat to your nails
- protect the skin around your nails with tape or petroleum jelly
- drop different colors of nail polish onto the surface of the water, one drop at a time
- use a toothpick to create patterns in the polish
- dip your nail into the water and use the toothpick to clean up excess polish around it
- carefully remove your nail and let it dry
- finish with a top coat to seal your design
3. STEP-BY-STEP TUTORIALS FOR STYLISH SUMMER DESIGNS

Let’s get into some fun and stylish summer nail designs! These tutorials will help you create eye-catching looks that are perfect for the season.
Tropical Paradise
Bring the beach to your fingertips with this tropical-themed design featuring palm trees and hibiscus flowers.
- Materials: blue, green, pink, and yellow nail polishes, nail art brushes, dotting tool, base coat, top coat
- Step-by-Step:
- apply a base coat to your nails
- paint your nails with a blue base color and let it dry
- use a nail art brush to paint palm trees with green polish
- add hibiscus flowers using pink and yellow polishes and a dotting tool
- finish with a top coat to protect your design
Beach Waves
Capture the essence of the ocean with this beach-inspired nail art.
- Materials: blue, white, and sandy beige nail polishes, makeup sponge, nail art brushes, base coat, top coat
- Step-by-Step:
- apply a base coat to your nails
- paint your nails with a sandy beige base color and let it dry
- use a makeup sponge to dab blue polish onto the tips of your nails, creating a wave effect
- add white polish to the tips for a frothy wave look
- finish with a top coat to seal your design
Fruit Fiesta
Nothing says summer like fruity nail art! Here’s how to create fun designs like watermelons, pineapples, and lemons.
- Materials: red, green, yellow, and black nail polishes, nail art brushes, dotting tool, base coat, top coat
- Watermelon Design:
- apply a base coat to your nails
- paint your nails with red polish and let it dry
- use a nail art brush to add green tips
- add black dots with a dotting tool for seeds
- finish with a top coat
- Pineapple Design:
- paint your nails with yellow polish and let it dry
- use a nail art brush to add green leaves at the cuticle
- draw diagonal lines with a nail art brush to create a pineapple texture
- finish with a top coat
- Lemon Design:
- paint your nails with yellow polish and let it dry
- use white polish to create lemon slices with a nail art brush
- add small green leaves for a fresh look
- finish with a top coat
Sunset Ombre
Create a stunning sunset ombre effect with these steps:
- Materials: Yellow, orange, pink, and purple nail polishes, makeup sponge, base coat, top coat
- Step-by-Step:
- apply a base coat to your nails
- paint your nails with a yellow base color and let it dry
- use a makeup sponge to dab orange, pink, and purple polishes in layers, creating a gradient effect
- repeat until you achieve a smooth ombre look
- finish with a top coat to seal your design
4. TIPS FOR LONG-LASTING DIY NAIL ART

Once you’ve created your beautiful summer nail designs, you will want to make them last as long as possible. Here are some tips to help you maintain your nail art.
Proper Nail Prep
Preparing your nails before applying polish is key to achieving a smooth and long-lasting manicure. Here’s how:
- Clean Nails: remove any old polish and clean your nails thoroughly
- Shape and Buff: shape your nails with a file and buff the surface to remove ridges
- Cuticle care: push back your cuticles gently with a cuticle pusher
Base and Top Coats
Using a good base and top coat can significantly extend the life of your nail art. Here’s why:
- Base coat: a base coat creates a smooth surface for the polish to adhere to and prevents staining
- Top coat: a top coat seals your design, adds shine, and protects against chipping. Look for long-lasting, quick-dry options
Maintenance Tips
Keep your nails looking fresh with these maintenance tips:
- Avoid water exposure: excessive exposure to water can cause your polish to chip. Wear gloves when doing dishes or cleaning
- Moisturize: keep your cuticles and hands moisturized to prevent dryness and cracking
- Touch-Ups: if you notice chips, do quick touch-ups with matching polish and a top coat
Quick Fixes
For those inevitable mishaps, here are some quick fixes:
- Smudges: smooth out smudges with a damp finger or a small brush dipped in nail polish remover
- Chips: use a matching polish to fill in chips, then apply a top coat
- Peeling: apply a thin layer of top coat to seal any peeling edges
CONCLUSION
With these affordable tools, budget-friendly techniques, and stylish summer designs, you’re all set to create stunning DIY nail art at home and make your nails the envy of all your friends.
Remember, practice makes perfect, so do not be discouraged if your first attempts aren’t flawless. Have fun, get creative, and most importantly, enjoy the process.
Happy nail art-ing!
I hope you found this blog post helpful and insightful. Kindly share and follow me on Pinterest and LinkedIn for the latest posts.
 ABOUT CHRISTY MICHAEL
I am passionate about finding creative ways to pay off debts, make more money, and save more money; and helping people achieve their financial goals and ultimately, financial freedom. My journey of overcoming consumer debts and achieving financial independence inspired me to start FinanceWit.org (with no knowledge or experience with blogs). FinanceWit is a personal finance and money matters blog, where I share a treasure trove of tips, tricks, and innovative strategies to fast-track your journey to debt freedom. Want to dive deeper into my story? Read more about me here.
